

You don’t need a ton of online course tips to look like a pro – here are 3 quick ones you can use to help your course look more professional.
It's been proven – online students expect a certain level of professionalism.
But the good news is, you don’t have to be a professional to teach online.
Below, we’ve laid out some quick hacks to help your online course look more professional than you have the time or budget for.
3 Online Course Tips That'll Make You Look Like a Pro
Your students just shelled out good money for your online course, so it needs to look good.
You can get away with typos and formatting errors in free content, but not in online courses people are paying for.
Here are a few ways to do it.
Pro Online Course Tip #1: Set the Stage for Professionalism with High-Quality Video
All of your videos should be high-quality, but you don't have to be a professional videographer to do this.
Keep in mind your students have paid for this, so your online course videos shouldn’t look free.
Quick things to remember for good video quality are: good lighting, good audio, and no background noise. You’d be surprised how distracting even the slightest background noise can be in a course.
And you can easily make your videos look professional on a budget. Here are our tips for cutting production costs.
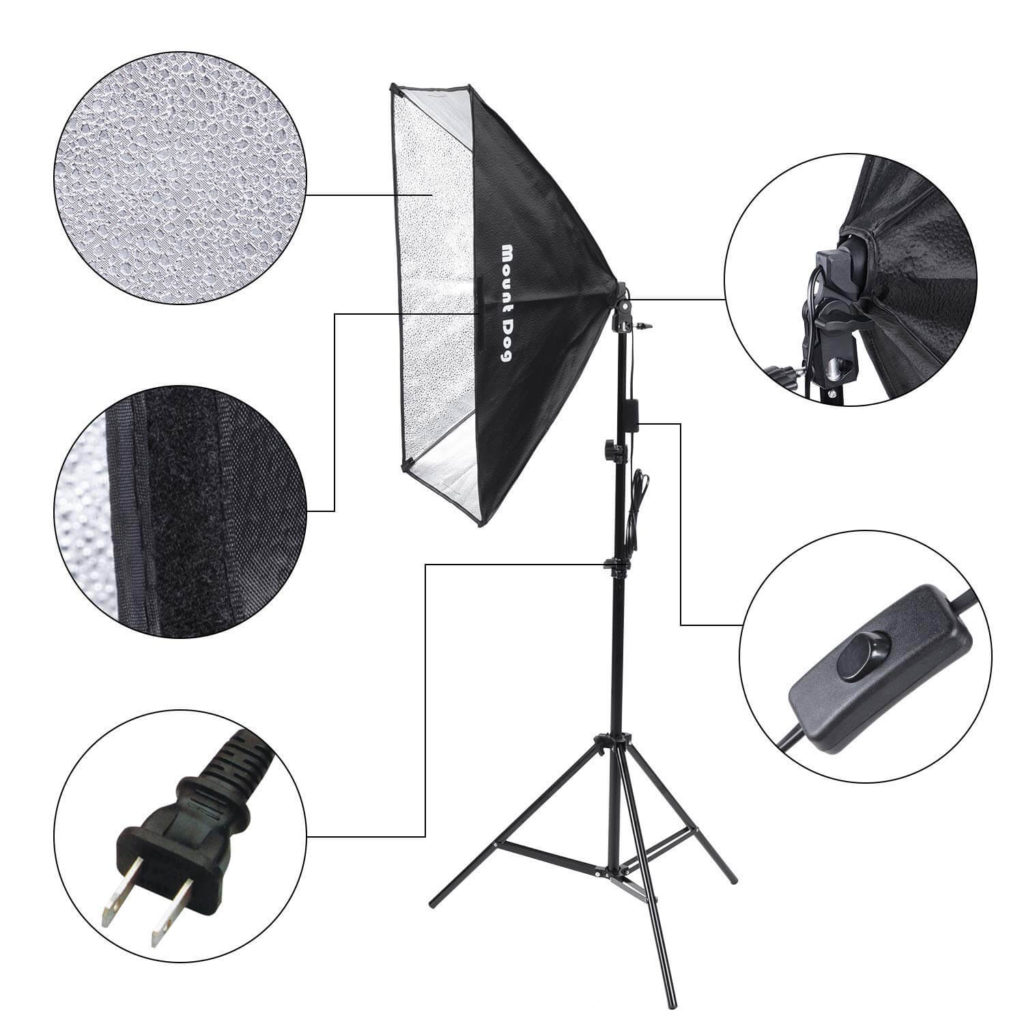
Buy a cheap lighting and backdrop kit on Amazon for $120 – If you’re lost as to what lights to use and how to set up your backdrop, Amazon’s got great kits with everything included. Check out this one for $120.

And if you’re curious how you might look once this is all set up, here’s what it looks like for course creator Jeffrey Mort. (He used an Amazon lighting kit.)

Use natural lighting – If you’re not big on ordering lights, try natural lighting. Shooting your video in a room full of windows will bring in the best natural lighting, perfect for your video. Make sure to shoot when the room is at its brightest during the day.
If you do want professional lighting, and you don’t want an entire backdrop kit, there’s a light set for $37 on Amazon that came highly recommended by course creators in the now-archived Teachable Tribe on Facebook.
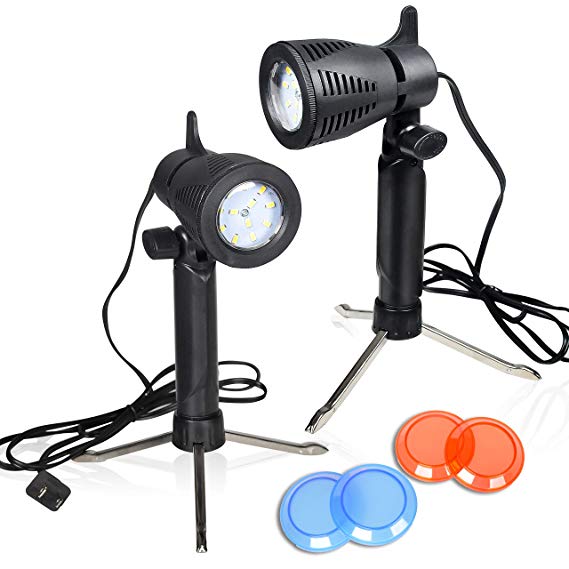
If you don't want a huge set-up like this, I spoke with another course creator who uses portable camera photo lighting from Amazon for $17.99.
And if you're completely lost on lighting and how best to use it, there's a great tutorial on YouTube on how you can create cinematic lighting.
Your smartphone or your MacBook is your friend – Most up to date iPhones or Androids have really good video quality. Nowadays, using what you have to record your video lessons is good enough, so long as the audio and lighting are good. Speaking of audio…
Use a good microphone for audio – Depending on the kind of course you’re creating, you’ll need a good mic if you want to look (and sound) like a pro. If you’re just looking for good audio to record lessons without video, check out this Toner PC Microphone for $21. It comes with a pop filter and a microphone stand.

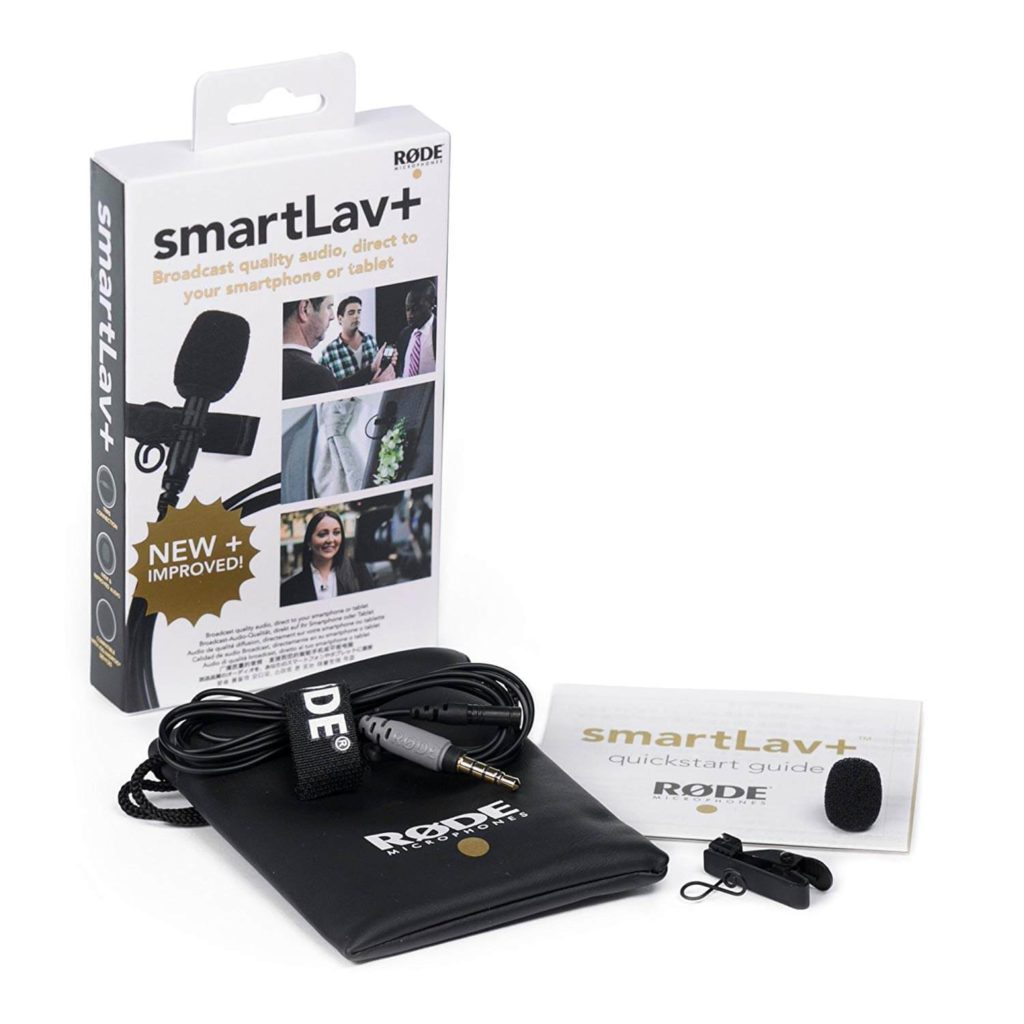
But if you need good audio with video, because you’ll be doing a “talking head” video, try a lavalier mic (the kind you clip onto your lapel). There are some cheaper ones on Amazon, but most course creators recommend the Rode brand. Here’s the cheapest Rode lavalier mic I’ve found so far, at $66.
Pro Online Course Tip #2: Create a Brand Around Your Course
There’s a reason people spend hundreds of dollars on designer shoes. Branding is everything! If you want to be the Jimmy Choo of course creators, follow these guidelines to make sure people recognize your brand when they see your course.
Think about your color scheme – Start with choosing consistent brand colors in your online course. Designing Digitally wrote an interesting article on how selecting certain colors can shift your readers’ mood.
Cool colors in the blue pallet evoke calm feelings, but can also make people feel sad. The red spectrum can help produce energy and motivation, but can also trigger aggression.
On the other hand, yellow can evoke feelings of happiness. Needless to say, you should be careful with which colors you choose for your course brand.
Don’t use bad font – Font in your online course is another major factor you need to consider. It’s important to choose appealing fonts for headers and your body copy and to keep them consistent within your course. Try not to use more than 2-3 font types to avoid things looking inconsistent and a bit messy. You can check out a more in-depth post we wrote on course fonts on here.
Keep it consistent – Everything in your online course – the videos, PDFs, or slides in your lessons – should be consistent with your brand. This will make it easier for your students to focus on the lesson material (because there’s no distracting fonts/colors), and add a layer of professionalism to your course.
If you’re just starting out with online courses and looking for an easy way to set your course brand colors/fonts, check out Thinkific (my personal fav). They have pre-set templates to choose from, and you can customize your course around the thematic template. While they do have a free version to test out Thinkific, there is a monthly subscription fee if you want the real deal.
If you’re more of a DIYer like me, Canva is a great choice. It's a graphic design tool that lets you play with various layout suggestions and fonts to create the perfect brand. The best part – you can use most of their tools for free!
Pro Online Course Tip #3: Make Sure All Course Content is Clean and Consistent
The last thing your students want to read is a messy, choppy course riddled with typos. And let’s be real, they deserve better! We recommend creating a course stylesheet to help keep things consistent and error-free.
A stylesheet says how certain words are spelled in your course. It says what gets capitalized, how numbers/dates/abbreviations are written, etc. All professional editors use stylesheets to edit great books, so I highly recommend using one to edit your course content.
If you’ve been reading my posts for any amount of time, you know bad grammar kills authority and course sales. And it’s not just me, studies show that grammar mistakes are costing businesses a lot of money.
We offer a free online course stylesheet template in our resource guide, 5 Tips to Boost the Value of Your Online Course.
After you’ve proofread your online course and double-checked your course stylesheet, use Grammarly to make sure your course is clean. It’s an application that will highlight any grammar mistakes in your course and gives you suggestions to fix them. While Grammarly does have premium plans to choose from, you can download a free version that works just as well.

The Bottom Line – Do Your Best to Look Like a Pro
Your online course should look like what it’s worth. When creating your online course, keep in mind the following:
- Use high-quality video – Quick things to always keep in mind for good video quality are: good lighting, good audio, and no background noise.
- Create a brand around your course – Choose a thoughtful color scheme for your course and keep your branding consistent.
- Make sure your course content is clean and consistent – Use tools like a course stylesheet and Grammarly to create an error-free online course.
What do you think?
What helps your course give off a professional vibe? Leave your tip in the comment section below!